
Shopify dropshipping means selling through a Shopify store while a supplier ships the products directly to your customers. You build the storefront, set prices, collect payment and handle customer service. The supplier supplies and dispatches the goods through an app connection or another agreed order process.
To start, choose a small product range, qualify a supplier, build the store, configure payments and shipping, and test an order all the way through delivery. A working checkout is only one part of a working store. The product, address, shipping promise and payment must also reach the people who will fulfill the order.
This walkthrough follows that setup in order. For the business model beyond Shopify, the broader dropshipping overview explains how sourcing, marketing and operating costs fit together.
01
How Shopify dropshipping works
A customer buys a product from your Shopify store. You arrange the corresponding purchase or fulfillment request with your supplier, which ships to the customer. Your store provides the order confirmation, answers questions and handles the customer’s resolution if something goes wrong. Shopify’s dropshipping documentation describes this separation between the retailer’s store and the supplier’s physical shipment.
Three things move through the process:
- Order information: the exact variant, quantity, shipping address and selected service.
- Money: the customer’s payment, your supplier payment and the later payout to your bank.
- Goods: the correct items, packed and handed to a carrier for delivery.
An app can connect parts of those movements. It does not make them interchangeable. An imported product is not a stock reservation, and a successful card charge does not establish that your supplier has accepted the order.
Decide who checks new orders, who pays the supplier and who investigates missing shipments before launch. In a small store, those may all be your jobs. You can delegate them later without changing the customer’s need for a clear answer.
02
Choose a small product range and a workable supplier
Start with a customer problem you can describe precisely. A compact range of compatible desk accessories is easier to explain, sample and maintain than hundreds of unrelated products imported because an app made them available.
Check demand, competing offers and likely acquisition costs through product research. Then narrow the catalog to products with a deliverable offer: an acceptable item, a workable cost, a supportable delivery estimate and a supplier willing to fulfill individual orders.
There are several ways to source products for Shopify:
| Connection | What to establish before choosing it |
|---|---|
| Supplier or sourcing app | Which supplier fulfills each product, how orders are purchased, what inventory updates mean and how returns work |
| Direct supplier arrangement | Whether the supplier accepts individual customer orders and how order files, payment and tracking will move |
| Shopify Collective | Whether your store and the supplier meet the program’s current requirements and whether its available products fit your customers |
| Print-on-demand provider | Production requirements, print or personalization accuracy, production time and the treatment of customized returns |
Collective has specific eligibility conditions; installing it does not establish that a store can use every feature. Check Shopify’s current Collective requirements for your business before making it the basis of your launch.
Ask a prospective supplier for the dispatch location, product specifications, stock-update method, processing time, shipping services and return address. Confirm that you may use its images and sell the products in your intended channels and markets. Our supplier qualification process goes deeper into those checks.
Order a sample through the route your customer would use. Examine the product, packaging, inserts and tracking messages. Shopify also recommends sample orders when choosing suppliers. A good sample is useful evidence about that order; repeat the check if you change the product, packing arrangement or dispatch location.
03
Build the store around a real purchase
Create your Shopify store with business and contact details you can maintain. Select the selling currency and initial markets deliberately, then connect a domain and confirm that it opens the intended storefront. Keep the first launch geographically manageable: every additional destination adds questions about shipping, payment, tax and returns.
Choose a theme that presents your products clearly on a phone. Build the essential navigation around what customers need to buy: the product range, delivery information, returns and a working contact route. Use a monitored support email address and send yourself a message through the contact form.
Add products you have actually checked
Whether you import products through an app or enter them yourself, review each listing before publication. Replace supplier copy that is inaccurate, vague or inconsistent with the sample. Record the correct variant options, dimensions, materials, included parts and compatibility limits.
For an illustrative desk-accessory store, a cable tray page should tell the buyer whether mounting screws are included, which desk thicknesses it fits and whether installation requires drilling. Those details can prevent a return more effectively than a generic paragraph about quality.
Give each variant a reliable SKU mapping. Check that the image changes to the selected color or model, the displayed price is right and an unavailable option cannot quietly become an order you cannot supply. Keep unverified products unpublished while you resolve them.
Make the purchase conditions easy to find
Write shipping and return information around your actual arrangement. Explain processing time separately from transit, identify destinations you serve and tell customers how to report a problem. Review any policy template before using it; a template cannot determine your supplier’s return address or your obligations in a particular market.
Place important restrictions where they affect a decision. A compatibility requirement belongs on the product page. A delivery limitation should be visible before payment. A returns page linked only from the footer does not help someone choosing between two sizes.
Preview the whole purchase on mobile: collection, product, variant selection, cart and checkout. Fix missing images, unreadable options and confusing shipping language before adding more design features.
04
Set up payments and the money needed to fulfill orders
Choose a payment provider available to your business. Shopify Payments eligibility depends on the country where the business is based and the type of business, with country-specific verification requirements. Use Shopify’s supported-country information to check eligibility; use an available third-party provider if Shopify Payments does not support your situation.
Prepare the requested business, identity and bank information accurately. Check whether payments and payouts are enabled, rather than assuming an unfinished application is ready because the checkout displays a payment method.
Customer payment and bank payout happen on different schedules. Shopify distinguishes payment settlement from the payout schedule and the bank’s processing time. The actual timing varies; consult the current payout timing documentation and your account status instead of planning around a universal number of days.
Before taking orders, answer these questions:
- Does the supplier require payment before accepting or dispatching an order?
- Which funds will cover that payment while the customer’s money is still unavailable?
- What happens if several orders arrive together or a payout needs additional review?
- Can you issue a customer refund while waiting for a supplier credit?
Keep subscription, app, product, freight and acquisition costs in your operating budget. The relevant number is what remains after the costs of obtaining and serving an order, not the gap between the retail price and the supplier’s product price. Use the dropshipping margin calculation to check that separately.
05
Connect the supplier and check every variant
Install the app from the Shopify App Store or the supplier’s documented installation route. Review the data and permissions requested before approving it; Shopify explains that those permissions appear during app installation. Only grant access for an integration you have chosen to use.
An import that looks right in the storefront still needs an operational check. Compare a small set of products in Shopify against the supplier’s records:
- Match the product and each variant to the correct supplier SKU.
- Confirm the location that will dispatch it to your launch market.
- Check how inventory changes reach the store and what quantity the supplier reports.
- Establish whether an order is only transmitted, explicitly accepted or also purchased automatically.
- Confirm how tracking and fulfillment updates return to Shopify.
Do not assume a supplier’s shared stock count is reserved for your customers. Determine how quickly the feed updates and what your store should do when it becomes stale. The inventory management guide explains the difference between physical stock, available quantities and allocations.
If an app supports automatic ordering, configure it only after understanding the acceptance and payment behavior. An integration that automatically sends an order still needs a way to handle an invalid address, missing stock or an unanswered request. Those release and recovery decisions are covered in automated dropshipping fulfillment.
06
Price shipping for the carts customers can actually buy
Obtain shipping costs for the products, origins and destinations you intend to sell. Include the supplier’s processing time when estimating the customer’s wait, but do not treat processing days as carrier transit days. Use the route-specific approach in dropshipping shipping times to build estimates you can explain.
Choose how to collect those costs: include them in the product price, charge a stated rate or use suitable calculated rates where supported. “Free shipping” still needs funding from the order economics. Check remote-area charges, weight or size restrictions and unsupported destinations before exposing the offer.
Shopify is gradually moving some shipping configuration from shipping profiles toward shipping options organized by market. The controls available can therefore differ between stores. Follow the settings and documentation for your store, then verify the actual checkout result. Shopify’s combined-rate documentation also explains cases in which rates from different profiles are added together.
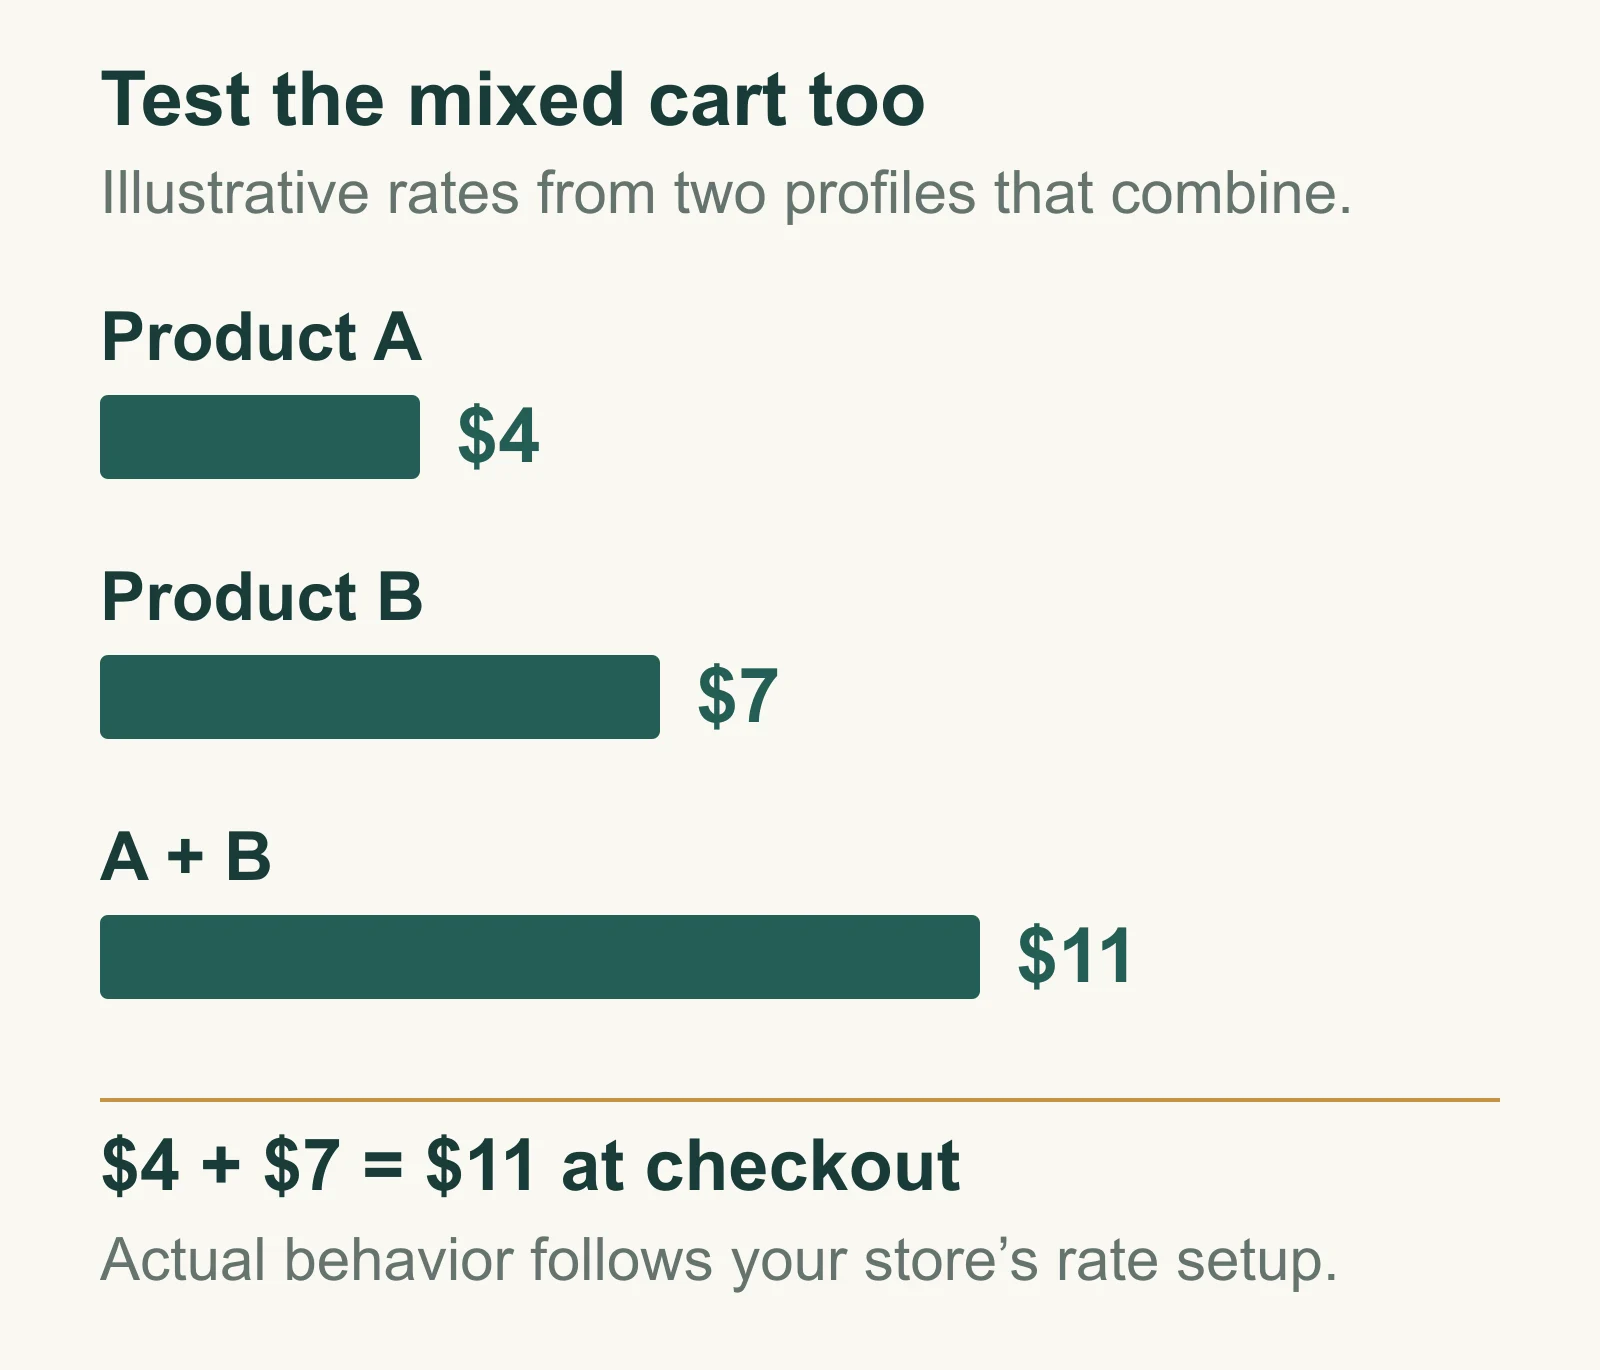
Consider this illustrative store with two shipping profiles whose rates combine. Product A carries a $4 shipping rate and product B a $7 rate. A mixed cart can show $11, even if your homepage says “$4 shipping.” This is a test scenario, not a rule that every two-supplier order adds two charges.
| Test cart | Expected charge in this example | What the test catches |
|---|---|---|
| Product A alone | $4 | The first product’s configured rate |
| Product B alone | $7 | The second product’s configured rate |
| A and B together | $11 | Combined rates that a single-item test misses |
Also test an address outside your supported destinations and a cart containing an unavailable variant. Decide whether the resulting checkout behavior is correct before inviting customers to encounter it. If suppliers send separate parcels, explain that possibility without promising that both will arrive together.
07
Run three different tests before launch
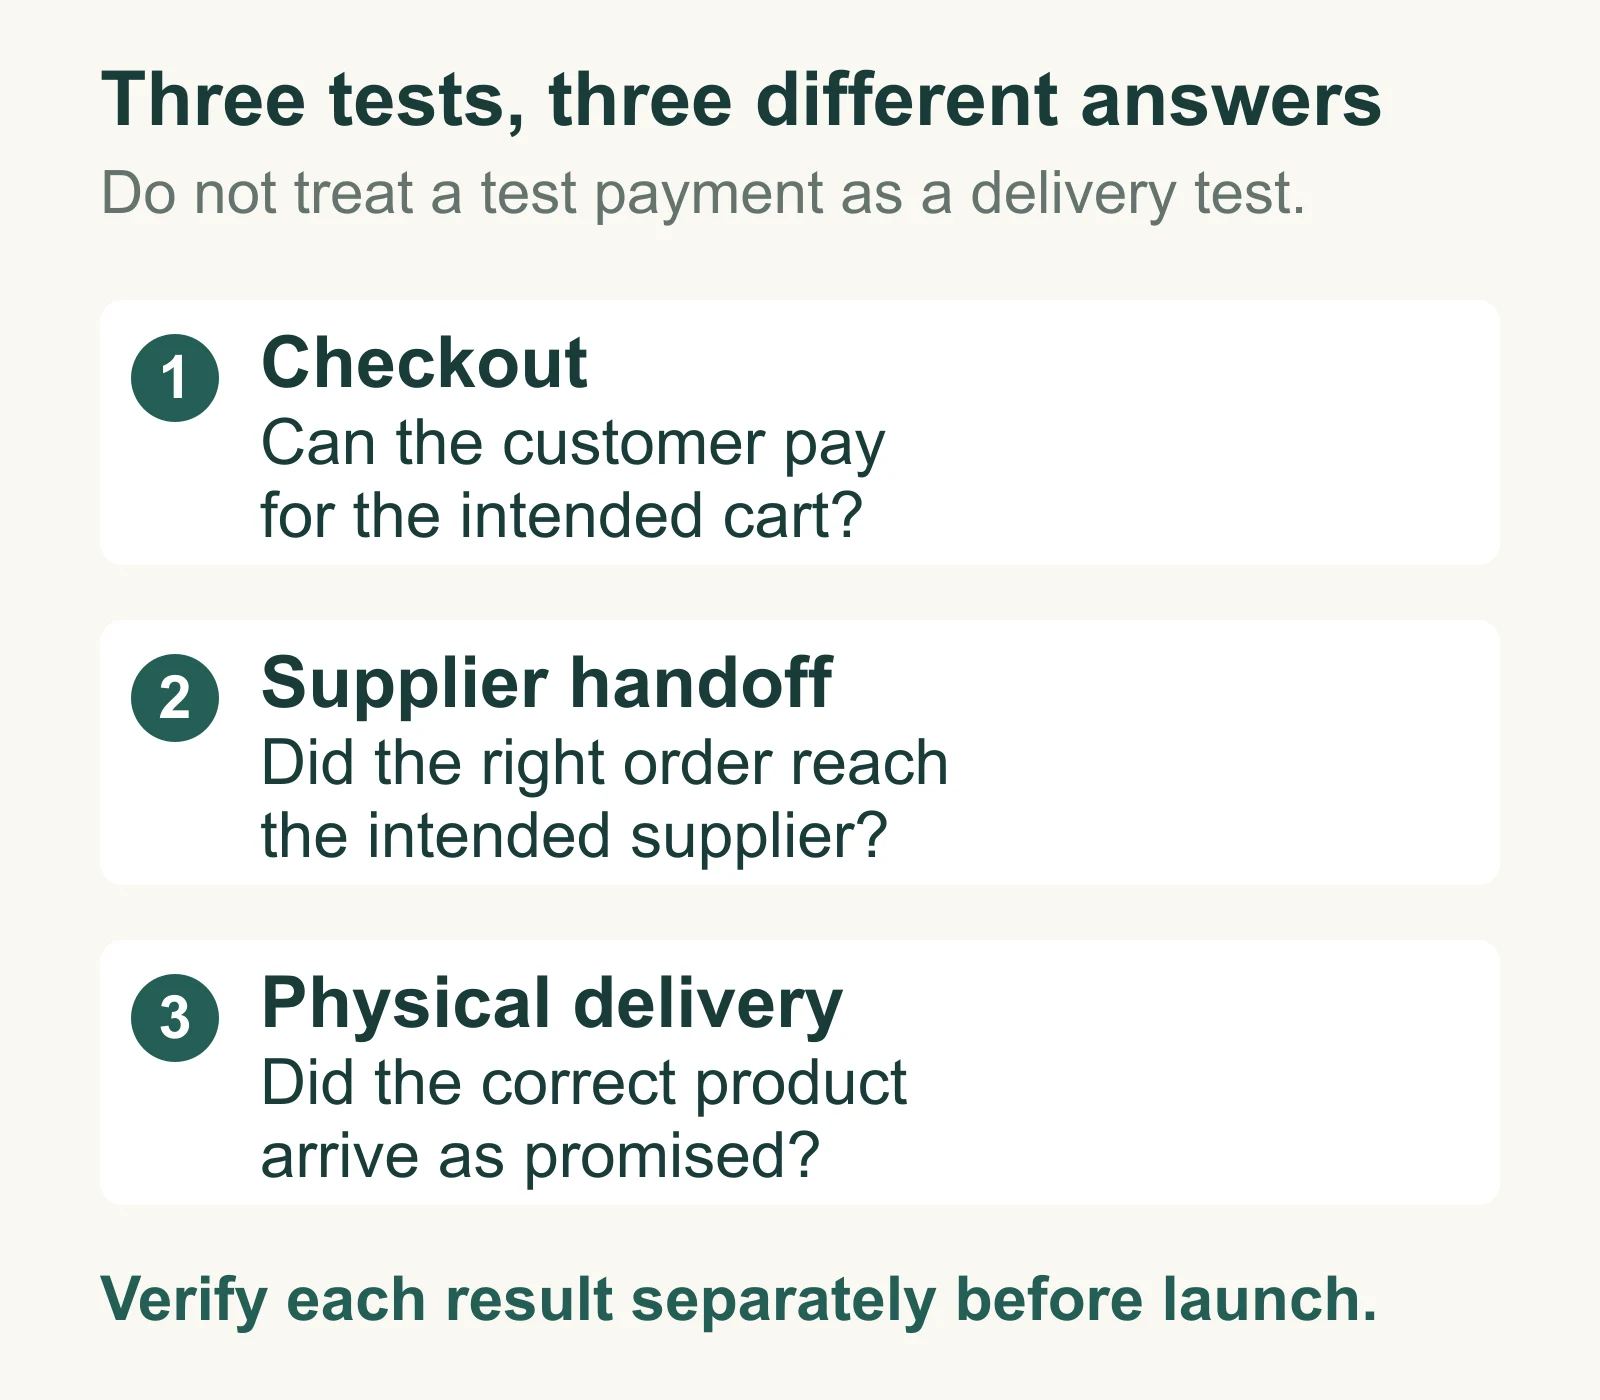
There are three separate things to test: checkout, supplier handoff and physical delivery. Each answers a different question. Record the result of each one so a simulated transaction does not become your only evidence that the store can serve a customer.
Test the checkout without confusing it with a shipment
Shopify supports simulated transactions through its test payment options, including Shopify Payments test mode where applicable. Its current test-order instructions say you must select a paid plan before testing a payment gateway. Test orders do not establish a real payout, and customers cannot place live orders while the payment provider is in test mode.
Before testing, confirm how your supplier app treats test orders. Pause automatic purchasing or use the provider’s documented test method if necessary. Do not assume an app will ignore every test order.
Run a successful checkout and a failed-payment scenario. Check the selected variant, address, shipping charge, applicable tax configuration, confirmation email and order record. Then test the mixed cart you prepared earlier.
Test the supplier handoff
Use the integration’s documented procedure to confirm that the intended supplier receives the correct SKU, quantity, address and service. Establish what its response means. A request received by software may still await payment or stock acceptance.
Check how the supplier reference appears against the Shopify order and how you would find a request needing attention. If the provider cannot simulate the complete handoff, record that limitation and verify it with the controlled real order instead.
Complete a real order and inspect the delivery
Send a paid order through the actual supplier and route to an address you can inspect. Open the parcel and compare the item, quantity, packaging and customer-facing documents with the listing. Follow the tracking and compare the delivery experience with what your store says.
A real payment test can involve fees under the payment provider’s terms, including fees that a refund might not reverse. Plan the test as a small operating expense. The result should show that the offer can be delivered, while recognizing that one successful parcel does not establish a reliable average delivery time.
08
Launch with a limited catalog and inspect the first orders
Before opening sales, turn off payment test mode and restore the intended live payment configuration. Confirm the domain, mobile purchase path, contact route, product availability and delivery and return information. Shopify’s launch preparation instructions cover testing, previewing and changing the storefront from private to public.
Start with the products and destinations you have checked. A small catalog makes it easier to investigate a problem while you are still learning how the supplier performs. Publish the remaining products after their own details and fulfillment arrangements are ready.
For early orders, inspect the work at each handoff:
- Review payment and any order concerns before release.
- Confirm supplier acceptance and resolve unavailable items or address problems.
- Check that the actual parcel receives tracking tied to the right items.
- Answer delivery questions and record the outcome of exceptions.
- Reconcile supplier charges, payment fees, refunds and bank payouts.
Use what those orders reveal to improve the product page, shipping estimate or supplier arrangement. Increase traffic when the economics and delivery experience justify it. The store setup section of the Dropshipping Hub connects the related setup topics as your catalog and operations expand.
09
Common Shopify dropshipping questions
Do I need to buy inventory first?
Supplier-direct dropshipping can operate without buying a warehouse allocation in advance. You still need money for samples, the store and supplier payments as orders arrive. Pre-purchased stock is a different operating choice, useful only when its benefits justify the cash and inventory risk.
Is a dropshipping app required?
No. A direct supplier relationship can use another agreed process for orders and tracking. An app can reduce manual work, but the important question is whether the process keeps products, payments and shipments accurate as order volume grows.
Can the store run itself after setup?
Routine steps can be automated. Product changes, supplier failures, payment issues and customer resolutions still need an owner. Review the early orders closely enough to learn which tasks are reliable and which need human decisions before expanding automation.